 02 9624 7099


There are strict steps the need to be followed when designing any space. A measuring mistake as small as 0.5cm can wreak havoc on the entire building, and planning is key to achieving the best outcome in your renovation or building project. To help you avoid some of the most common mistakes when it comes to building kitchens, here are three easy steps to begin the renovation or building process and kick-start your journey to creating the kitchen of your dreams.
Step 1 – Measure
The first step when renovating or building is to measure the existing space so you can accurately establish what you’re working with.
Measure your kitchen as precisely as possible – any mistakes, however minute, could cause big problems later down the line and impede your design plans. A simple sketch of a space will also be a useful spatial guide so you can assess how and where furniture and appliances will be placed, and what does and doesn’t work for you (e.g. work benches too close together, fridge too far away, etc).
Here is a quick guide of what you should measure:
- Floor to ceiling height.
- Distance between walls.
- Distance from corners to doors.
- Size of doors and their height and distance from the floor, ceiling and wall edges.
- Size of windows and their height and distance from the floor, ceiling and wall edges.
- You don’t need to measure power outlets or water and gas connections, but it is good to include them in the sketch of your kitchen space.
NOTE: Make sure to mark on your sketch where there are any hazards, special angles or unusual shapes in your kitchen. This could include pipes, ventilation or customised architectural features.
Step 2 – Pick a layout
Layout is probably the most important part of designing a new kitchen. Your kitchen’s layout will determine how practical and easy it is for you and your family to cook, eat and interact within the space. It’s tempting to jump the gun and start picking out colours or appliances, but the actual layout of your kitchen is something you really can’t overlook – it’s neither simple nor cheap to change once the renovations are finished.
You can start by researching kitchen layouts yourself online, or you can approach a designer who will draw up a customised layout according to your needs. This is why it’s important to measure and sketch your kitchen first – from this information you are able to see what will work spatially and what just isn’t possible when deciding on your new layout.
Here are three of the most popular kitchen layouts:
- L-Shaped – The social kitchen
A smart design for small and medium sized kitchens, the L-shaped kitchen features countertops on two adjoining walls so they are perpendicular to each other. This forms an L shape that is ideal if you want to add a dining room table or small island in the centre of the room for your family or guests to congregate around.
- U-Shaped – An Aussie standard
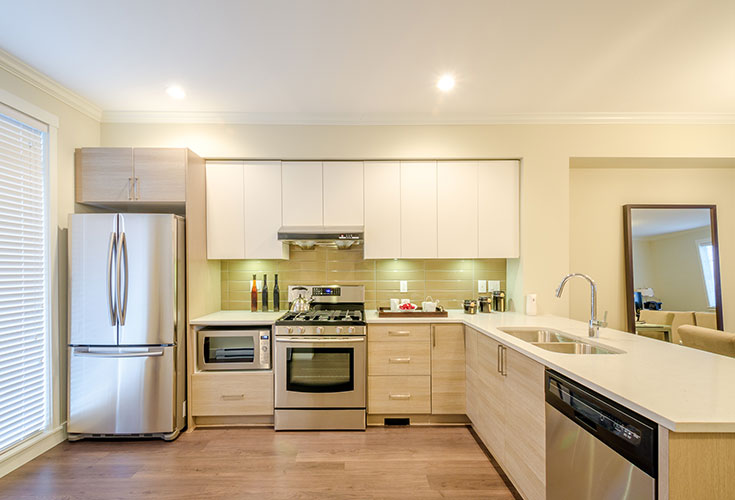
The U-shaped kitchen is the most common layout in Australia. It stands a favourite because of its ability to maximise on countertop and storage options, and how it allows two people to easily work together when preparing food. The design uses three walls – one for the cooktop and sink, one for appliances, and one for cupboards and pantry storage. This means it is only suitable for larger kitchen spaces. If you love cooking with family and friends, and are super organised with your space, this kitchen layout is the best for you!
- Galley or corridor – The train tracks
This kitchen involves two straight runs perpendicular to each other with the sink on one and the cooktop on the other. Depending on size constraints, you could design this layout with two walls or two parallel countertops or kitchen islands. The defining feature of this layout is it provides a walkway for traffic in between the two structures. Not only does this layout not require a lot of room, it increases the amount of workstations you have access to when preparing food. It’s the perfect small kitchen solution.
Step 3 – Know the most important design rules
By this stage you should have your kitchen measurements jotted down, as well as a good idea of the type of layout you’re after. Now you will need to combine this information to create the perfect kitchen. But what does that entail?
There are important design rules that you should always keep in mind when creating a new kitchen. These design rules were established by the National Kitchen & Bathroom Association in the 1940s, and have been updated over the years to include new technology and trends.
In total, there are 31 kitchen design rules that the National Kitchen & Bathroom Association say you must follow. But 31 rules is a lot to consider, especially if you are new to kitchen design.
So this article will introduce you to just one. It is the most important rule in the guide, relies on the size measurements and layout you’ve chosen in the previous steps, and is something that if you get wrong (and people often do), your dream kitchen will quickly become a nightmare.
The Work Triangle
The ‘work triangle’ is a term used by kitchen designers to describe the three point ergonomic arrangement between the three main areas of the kitchen – the cooktop, sink, and fridge. This concept is used to determine the efficiency of a space, and to prevent homeowners creating kitchens which are too cosy and small for easy movement, or too big and time consuming for tasks to be achieved.
Employing the work triangle will help with the configuration of a space. Traffic flow shouldn’t move through the triangle, and it’s important to create a dedicated pathway so people can walk through the kitchen without interrupting triangular workstation. If you aren’t convinced, just think of juggling a boiling hot dish straight from the oven with people walking by as you try to reach the benchtop!
Some examples of easy mistakes include:
- Installing an island bench that interrupts the work triangle so you have to walk around it to get to the sink, oven or fridge.
- Installing cabinet, cupboard and kitchen doors that, when opened, will block the work triangle.
According to the National Kitchen and Bathroom Association, each leg of the work triangle should be between 4 and 9 feet in length. This creates a total length of 12 to 26 feet when all three legs are combined.
Anything more or less and you’ll struggle to be efficient or productive in the space, which is exactly the opposite of what you want for a kitchen!