 02 9624 7099


Feel like you’re missing a little flavour in your cooking? Indoor herb gardens are a simple and cheap alternative to traditional garden beds. Fresh herbs not only taste and look great; they also have a wonderfully intoxicating aroma that will fill your home with warmth and charm.
With a variety of DIY projects and ready-made products available, let’s have a look at some of the most innovative, creative and fun ways to incorporate a little fresh greenery into your kitchen all year round.
Where to grow your herb garden
First step is establishing where your kitchen garden is going to grow. Factors you need to consider when setting up your indoor garden include light, traffic flow, space, and heat.
For example, exposing your herb garden to excessive heat, by placing it near your oven or stovetop, might dry or wither your plants, which will affect both their flavour and longevity.
So what are some of the best locations for your herbs?
- The windowsill – Windowsill gardens are fantastic as they take up space that isn’t immediately in your cooking space. It also has the added benefit of giving your plants some natural sunlight that they will love.
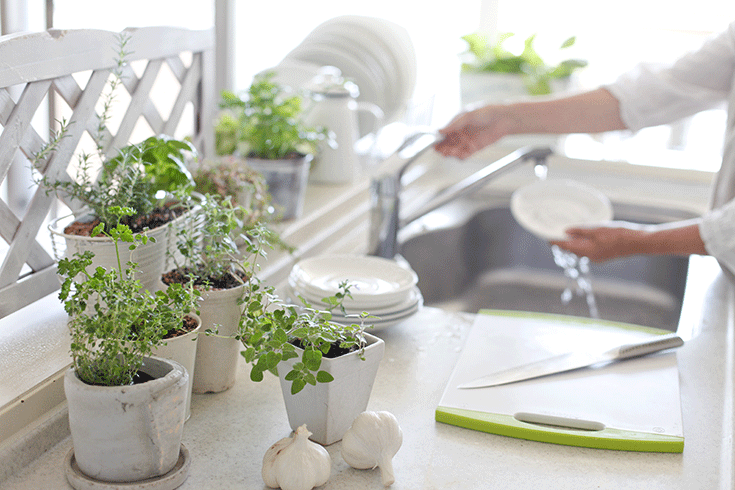
- On the countertop – If you have a big island or bench in your kitchen that needs a little decorative vibrancy, add some potted herbs. Just don’t forget that the herbs will need some sunlight every now and then.
- On the wall – Vertical gardens are on trend at the moment, and for a good reason! Ideal for small homes, indoor vertical gardens utilise a frequently overlooked storage space – the walls!
- From the ceiling or window – If none of the other options suit your kitchen or your style, then consider some hanging planters. Install hooks from the ceiling or top of the window to hook planters filled with fresh herbs. You can choose different length rope and different pot sizes so it’s a very flexible option if you don’t have any ‘shelf’ space to work with.
- Cupboard doors – Yes you can even install your garden on cupboard doors! Repurpose a hanging rack that you can fill with mini pots or old jars.
What to grow your herbs in
From DIY environmentally friendly options to traditional store bought pots there are many options to choose from. All you need is a good idea of how much you want to spend OR how creative and hands-on you want to be. Here are three quick and easy solutions:
Plastic bottles
By repurposing used plastic bottles into a herb garden, you are not only growing fresh herbs on the cheap, you are also helping the environment by keeping those plastic bottles out of landfill. Because of their abundance, plastic bottles are one of the easiest ways to incorporate herbs into your kitchen.
This self-watering recycled herb garden utilises old soft drink bottles like Coke and Sprite. Ideal for your countertop or windowsill, this DIY project is very cheap as all you need is soil, plants, bottles, a drill, newspaper and plastic bags. Alternatively, you can create a statement vertical garden like this one that can be hung over a wall or even along the unused side of a kitchen bench.
Ceramic pots
Traditional pots are a classic way to showcase your thriving plants. Repurpose some old pots from the garden or buy some new ones from the store. Decorate them with labels or bright colours and patterns for a playful touch, or keep them simple and neutral. The options are endless.
Show off your calligraphy and paint skills by painting labels on terracotta pots. This is great if you are still new to using herbs in your kitchen and aren’t familiar with which herb is which from sight. You can also create a modern twist on the classic pot and use coffee mugs instead! If you have any old or unwanted mugs lying in the back of the cupboard give them new life as a sweet pot for some herbs.
Remember, if your pots have drainage holes, water will leak through. So it’s a good idea to have trays or saucers underneath each pot to catch the offending drips.
Aluminium cans
Don’t recycle those cans just yet! They are herb holders in the making. Just like plastic bottles, by reusing cans you are saving the environment and minimising landfill. They also add a stylish touch to your kitchen, with a taste of industrial modernity.
This step-by-step herb garden will guide you through the whole process of making your very own indoor kitchen garden using cans. You can adapt this guide to suit your own cooking tastes.
Extra tip
It’s best to plant different herbs in separate pots. Of course, this option will take up more space but if you aren’t a confident green thumb it will be easier to maintain. Planting herbs separately has three benefits:
- Individual herbs have plenty of room to thrive
- You can easily move around and treat plants according to their specific needs
- Easy to re-pot if the plant dies or is need of some harsh maintenance
Which herbs grow best?
Choosing which herbs to grow comes down to two factors:
- What do you like to eat or cook with the most?
- What herbs will suit your kitchen?
the best approach to choosing herbs is to select hardy varieties that don’t need a lot of maintenance. These herbs include:
- Basil
- Chives
- Mint
- Oregano
- Thyme
- Parsley
- Sage
- Dill
Most herbs love the sun. So make sure your plants are in a nice sunny place in your kitchen or conversely can be moved into one during certain times of the day. If your kitchen doesn’t receive much natural light, it’s a good idea to go for herbs like mint, parsley and chives – while these plants still need a little sun, they are less reliant on those UV rays compared to some of their counterparts. If sunlight is almost non-existent in your kitchen, consider supplementing light with fluorescent bulbs that will trick plants into growing like they are outside in natural light.
Just remember, rotate the orientation of your plants regularly in relation to the source of sunlight so they don’t grow leaning to one direction!